Gillette Offers Support for Kids Through Orthotic Management
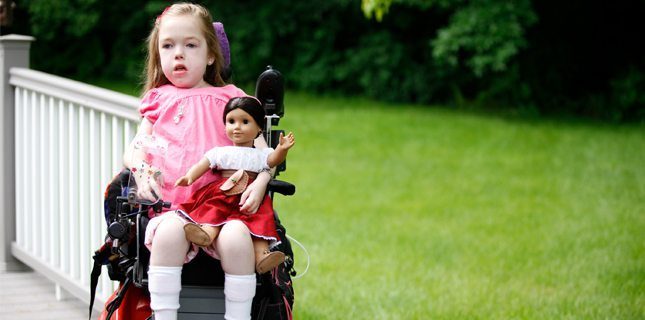
When a child is affected by a muscle tone issue in their back, knees, ankles, feet or upper extremities, it can take a big toll on their ability to do everyday activities. Both Pediatric Home Service and Gillette Children’s Specialty Healthcare care for kids each day with the mission to help them and their families enjoy life to its highest potential, which is why we were so interested to hear John Sytniak, MS, CPO, share his knowledge on orthotics at our office last fall. We wanted to pass what we learned along to you, in case you’re in the process of getting orthoses or even have had them for a long time but need a refresher.
What is an Orthotist?
When a child is in need of orthotics to prevent the development or progression of a deformity before it becomes rigid (or permanent), an orthotist will step in to evaluate and make recommendations for prescription if requested by the child’s physician.
“We typically go through the child’s range of motion, gait analysis and muscle testing,” says John. “Then we take all of those results into account and make a recommendation to the doctor as to what type of ankle foot orthosis (AFO) would work best for the patient.”
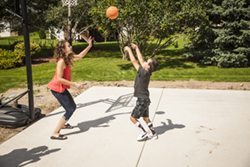 The goal in orthotic recommendations is to minimally brace the extremities where daily activities of living aren’t affected, but still provide the amount of support necessary.
Next, an impression is created based on the orthosis needed by wrapping the body part with fiberglass and then filling the mold with liquid plaster – leaving a 3D shape of the child’s limb or torso. An orthotist then modifies the plaster based on where more relief or pressure is needed, and heats the plastic up to add colors or patterns and pull air out to get a more exact fit of the plastic. Once it cools, the orthotic is trimmed and smoothed, and ready to be fitted!
Orthotists do a lot of collaboration with nurses, physical therapists, occupational therapists and physicians to ensure all of the patients care factors and needs are being taken into consideration, and also do a lot of follow up with patients as their needs change during growth.
The Benefits And Goals of Orthotic Management
As mentioned above, orthotists aim to prevent the development or progression of an adaptable deformation into a firmly fixed one.
“We see a lot of patients with high tone spasticity – and if it’s not managed well, these kids can develop rotational issues with bones,” says John. “So what we’re really trying to do is control the muscle tone issues as they grow so they don’t develop into a rigid type of deformity.”
Orthotic management also offers the opportunity to provide support to improve function – this might include providing orthoses that help hold their position correctly with trunk and head over their pelvis, or accommodating a deformity by bringing the floor up through orthoses to improve a patient’s balance and stability. Orthotists are also involved as needed for post-surgical immobilization to maintain a correction achieved through surgery to keep the deformity from occurring during the rehabilitation process.
How do Orthotics and Therapy Work Together?
Through a combination of therapy and use of orthotics, long term goals surrounding position and development can be obtained, providing a more efficient structure can be built for a child.
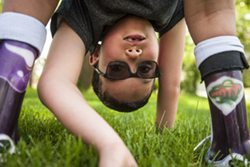
“The orthosis is helping to resist the flexible deformity and accommodating any rigid deformities to improve alignment,” explains John. “At the same time in therapy, the child’s musculature and skeleton will develop in the position being held with the support of the orthosis, helping it to strengthen and learn to support itself closer to the correct position.”
Ultimately, this combination will help lead patients to be more efficient in their walking, and lead to less pain in the long-term because of improved alignment. Patients will also consume less oxygen thanks to this improvement, and in some cases improve their pulmonary function.
Fitting An Ankle Foot Orthosis (AFO)
There are a few specific details you can look for to determine if the AFO is a proper fit for your child. These include:
- The calf edge of the AFO should be parallel with the skin. It should NOT cup into the calf.
- The edge of the foot portion of the AFO should also be parallel to the shape, but not dig into the skin
- Foot plates should generally come past the end of the toe
- The ankle portion should support the ankle well to give the most stability
- It’s important to allow appropriate clearance for the bony anatomy – so if there is a lot of pressure in one area, an orthotist will adjust the AFO’s shape slightly
- The foot strap will lock the heel into the brace, so it’s important to be snug. There should be little to no movement in their foot. The upper strap mainly locks the leg into the top of the brace.
To check whether your child is fitting all the way into their AFO, there are two tricks – looking for sock lint, and a dot of lipstick (or another easily wiped mark). If you find sock lint in the heel of their orthosis, that means there is a space where the build up can happen. If you put a dot of lipstick on the inside heel of the AFO and it doesn’t wipe off on their sock, their heel isn’t hitting the bottom of their brace.
Determining if an AFO is Outgrown
There are also a few signs that your child has grown too much for their AFO to provide a proper fit and support. You can look for these signs and contact your orthotist if you think a new size is in order.
- Your child’s toes are hanging over the end of the AFO (note: SMOs, or Supra-Malleolar Orthoses, are sometimes trimmed before the toes. If your child has this type of orthosis, this may not be an indicator of poor fit).
- There are signs of pressure in places where it hadn’t existed before. As a child’s foot grows, the length of the arch also grows and you may notice pressure spots appearing near the arch.
- The edge of the AFO around the calf does not contain the majority of the leg anymore
Fitting a Thoraco-Lumbar-Sacral Orthosis (TLSO)
A TLSO is a two-piece plastic brace supporting the spine from the thoracic vertebrae of the chest, to the base of the spine. Orthotists ensure proper fit by checking the following lines:
- The frontal upper edge of the brace should sit right below the clavicle
- The underarm edge sits comfortably below the armpit and shouldn’t impede the child from dropping their arms
- The bottom of the brace should be trimmed to a point where the patient’s thighs don’t push up the brace when seated
- Ensuring the straps are snug will provide the best support – some orthotists will put marks on the TLSO to show where the strap should be pulled to, but if there aren’t marks it should be as snug as possible. It’s okay if the two edges of the brace don’t meet.
Determining if a TLSO is Outgrown
A poorly fit TLSO can be very uncomfortable – here are a few signs your child may have outgrown theirs:
- The screws aren’t lining up anymore
- Their trunk is leaning in one direction – this may be due to the side falling too low on their body now, allowing them to fall into it more.
- Abnormal pressures you hadn’t previous noticed begin to appear
Selecting Footwear with Orthotics
It’s important to find the proper socks and shoes that will make your child’s orthoses most comfortable. When the orthotist makes a mold before the orthosis is created, socks are taken into consideration for fit. Here are a few tips for success.
- Socks should be seamless, and cotton is best
- Make sure socks fit appropriately – a lot of wrinkles in the sock can be uncomfortable and create a lot of unnecessary pressure.
- Socks should come above the top of an AFO
- Keep socks clean and dry
- Bring your orthosis with when purchasing shoes – ensuring they’re large and wide enough to fit, but not overly large
- Remove the insole of the shoe
A Typical Break-In Schedule
Families will be given a break-in schedule before leaving with a new orthosis, but typically will see a plan similar to this:
- Day 1 & 2: wear 1-2 hours, take off for 30-60 minutes and do a skin check. Redness should fade in 30 minutes.
- Day 3 & 4 – wear 3-4 hours, take off for 30-60 minutes, check skin, repeat again.
- Day 5 & 6 – 5-7 hours, off for 30-60 minutes, skin check, repeat
- Day 7 & forward – should be able to wear comfortably for the doctor prescribed wear time
Skin Care With An Orthosis
Protection and prevention of skin issues is crucial, because once they are present it’s much harder to heal. If open sores do develop, you should discontinue use and notify your orthotist so adjustments can be made. There are a few tips for prevention:
- Always wear clean and dry socks or t-shirts. These items should be cleaned and dried daily.
- Put clothing on with minimal wrinkles to avoid unnecessary pressures
- Check the skin frequently for redness, especially during the break-in schedule
- It is impossible to make an orthosis that doesn’t have some type of pressure to it. As long as the redness goes away within 30 minutes of taking off the orthosis, it’s okay – but anything that lasts longer should be brought to the physician’s attention.
- Avoid lotions, creams, or oils under the brace as it can soften the skin and make it more susceptible to breakdown
- Do not clean orthoses with bleach or disinfectant wipes, as these can irritate the skin (even if you let them dry first). Simply wipe it down with soap and water and let it completely dry.
We are so grateful to have knowledgeable partners like John Sytniak and Gillette in our community of health care providers, helping to provide comprehensive care for a complex and exceptional population of kids with big futures ahead. If you have any questions regarding orthotics for John, please leave them in the comments and we will ensure they get answered!
Originally published: November 15, 2017
